You may have created Facebook Pages that are no longer required. What options are available to you?
A solution could be to merge the duplicate Facebook Pages. But how do you do this? Please take note that these instructions can and will change as Facebook continues to roll out more features.
Before you start with your duplicate Facebook Pages Merge
- Confirm that you are a Facebook ADMIN on both pages.
- Edit your pages to ensure that the company names on both Facebook pages match. Do they share the same addresses or category? At this stage, I would usually recommend that you edit the page that you do not want to keep. But remember, Facebook limits the number of times you change a business name and this process usually has to go through a Facebook approval step.
- Some examples when considering the setup above – Cathy’s Local Hotel. Good merges would be Cathy’s Local Hotel to Cathy’s Local Hotel. A bad merge would be Cathy’s local Hotel to Hotel.
Step 1 of your Facebook Page Merge
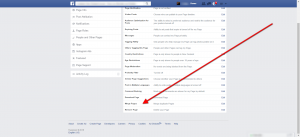
Click on the admin settings tab of either of the two Facebook pages you want to merge. Under the “general” feature, there will be a menu item at the bottom called “Merge Pages.” Expand this section and then click on the “Merge duplicate Pages” link.
You will then be prompted via a pop-up box asking for your Facebook password.
Step 2 of your Duplicate Facebook Page Merge
Note: When your Pages are merged, the people who like your Pages and any check-ins will be combined, but posts, photos, reviews, ratings and the username will be deleted from the Page you merge. The Facebook Page you want to keep will remain unchanged, except for the addition of people who like the Page and check-ins that were merged from the other Page. The Page you don’t want to keep will be removed from Facebook, and you will not be able to unmerge it.
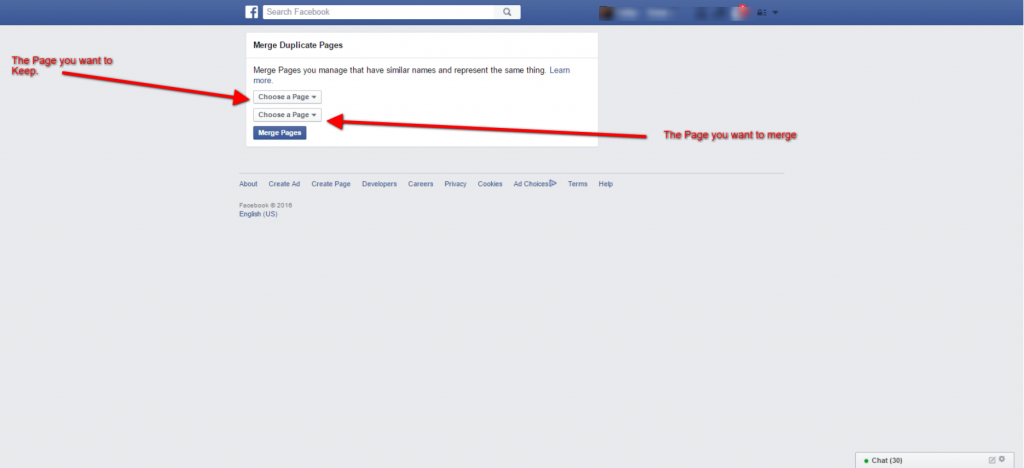
You will be now directed to a new page where you will be asked to choose the two pages you want to merge together. The drop down menu will list all the Facebook business pages you manage. Please be sure to order the pages as follows.
- In the top box, choose the page you want to keep.
- In the bottom box, choose the page you want to merge.
Click ‘Merge Pages’ and a pop-up window will appear if it was successful. Your page will be permanently removed from Facebook and you won’t be able to unmerge it.
Facebook Tip: Merge a page with “less” likes and activity into a page with “more” likes and activity.
Step 3 of your Facebook Page Merge
In most cases, the above steps complete the merging process and the duplicate page will no longer exist, while the main page will now include the likes and check-ins from the duplicate page. This process tends to be quick, and you will immediately no longer be able to access the page you merged. (It can, however, take a few hours for the likes/check-ins to appear on your remaining page).
However, if you are unsuccessful in merging the pages, a pop-up window will notify you, with a message that may look like follows.
Our review of the name change may take up to 3 days and require additional information. If the name change is approved, you may have to wait 7 days while we let the people who like that Page know that the name’s been updated. During this time, you will not be able to unpublish or change the name of either Page.
If further support is needed. Facebook recently added a ‘Page Support’ tab. This can be found under your main page’s admin Settings. You’ll see a history of your support requests (including your merge requests) and the status of those requests. Or use this link to find additional support.
Or you could just give us a Call and we will assist you all your digital needs.


